Notes to test driven development with Django using pycharm (chp 1)
Contents
0 Check points
- Setting up a virtual environment and adding packages to the project
- Editing the command line parameters to the “run” button, which is equivalent to “python xxx.py xxx”
- Checking the output log space on the bottom of the screen.
- Functional test to retrieve the web page from a server
1 setup the virtual environment
After downloading and installing the pycharm, the first time you start you would see the following:
Let’s now setup the virtual environment for the first project. We choose “Create New Project” and a new dialogue pops up. After choosing the Django project and changing the location/folder name to be “superlists”, we click the menu to create the virtual environment fit to this project.
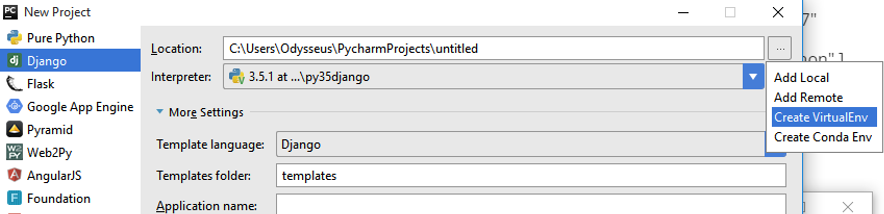
We choose “Create VirtualEnv” and find the right python interpreter you want to use. In this case, we choose python 3.5. You could find the interpreter in the your python installation folder.
Then we go ahead to press the create button on the bottom of the dialogue then your basic workspace is finished.
2 Add packages used in the project
After this, we would like to setup the python packages used for this project. To do so, we click the file menu and choose setting. Then the setting dialogue will pop up.
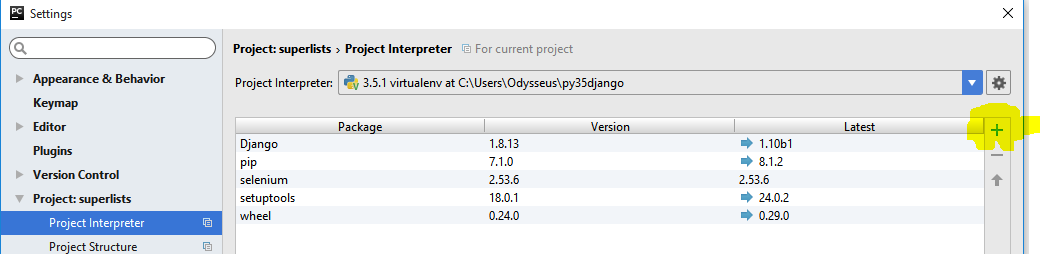
We then used the “+” on the side to add more packages:
- Django (version 1.8)
- selenium (latest version)
3 First run of Django initial content
You could do two ways:
- Under the run menu, choose configuation and add script parameter: “runserver” :

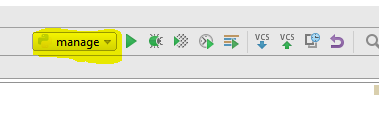
- on top right of the coding space, there are several button to click. You could start with the highlighted button. change the file to manage.py and choose “edit configuration” to add “runserver”.
Those changes (basically add a parameter “runserver”) are for IDE. If you want to use command line (CLI), it looks like this:
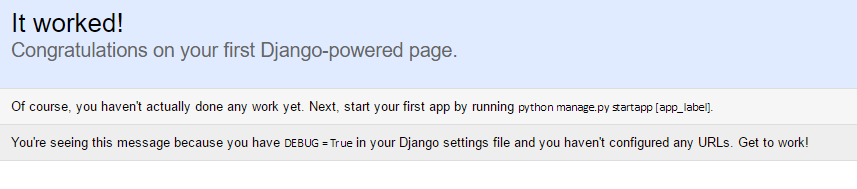
The sucessuful log and the corresponding output in brower (http://127.0.0.1:8000)looks like this:

## 4 First functional test
Of course, we could test whether the web page is hosted normally or not by using a browser to check the page. But we want this process to be automated reducing the manual work. So to test whether our design is functioned right, we perform functional test.
This involves a python package called selenium. So we right click the top level folder on the left panel, and choose New ==> python file.
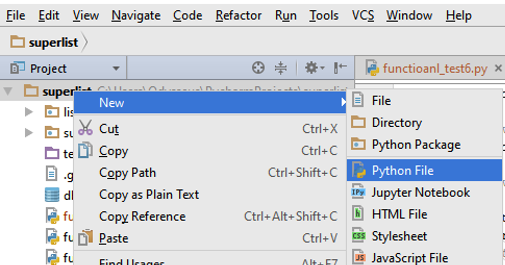
We named this file "functional_test1.py", which has the following code:
from selenium import webdriver
browser = webdriver.Chrome(“C:\Users\Odysseus\Downloads\chromedriver.exe”) browser.get(‘http://localhost:8000')
assert ‘Django’ in browser.title
brower.quit()
In this code, we simulate Chrome(In the book, author uses Firefox, which I don't have on my computer.). You have to download the "chromedriver.exe" from google:
https://sites.google.com/a/chromium.org/chromedriver/downloads ```
Because I what I am showing here is how windows user could setup whole stuff to run. However, If you encountered problem or worked on other platform, you could refer to the following topic in “stackoverflow” :
http://stackoverflow.com/questions/8255929/running-webdriver-chrome-with-selenium
http://stackoverflow.com/questions/13724778/how-to-run-selenium-webdriver-test-cases-in-chrome
If everything setup right, you should see a new chrome window start and pops up and retrieving data from the server by itself. Later, it will close itself. And the following message appears in the log window in pycharm:

You would find the yellow highlighted button useful, if you want to repeatedly run the same code. Like in this case, if you failed the functional test, you repeat it again and again until you pass it.